 NativTap
Before you begin
- You need an Apple Developer Program membership. The last section of this article gives its price and compares what Apple asks of an Individual and of an Organization.
- The Account Holder of your Apple account must request access to the App Store Connect API once. Apple reviews each request.
- Nativtap never asks for your Apple ID password.
Connect your App Store Connect API key
- From your Shopify admin, go to Nativtap > Settings > Apple account. The first card is App Store Connect API key.
- In App Store Connect, open Users and Access.
- Open Integrations.
- If you see Request Access, ask the Account Holder to select it.
- If the Account Holder selected Request Access, they agree to the terms and submit the request.
- Create a Team key with the App Manager role. Individual keys don't work.
- Download the
.p8file and keep a copy. Apple lets you download a key's private file only once. - In Nativtap, enter the Issuer ID from App Store Connect.
- Enter the 10-character Key ID shown next to your key.
- Add the file under Private key file (.p8).
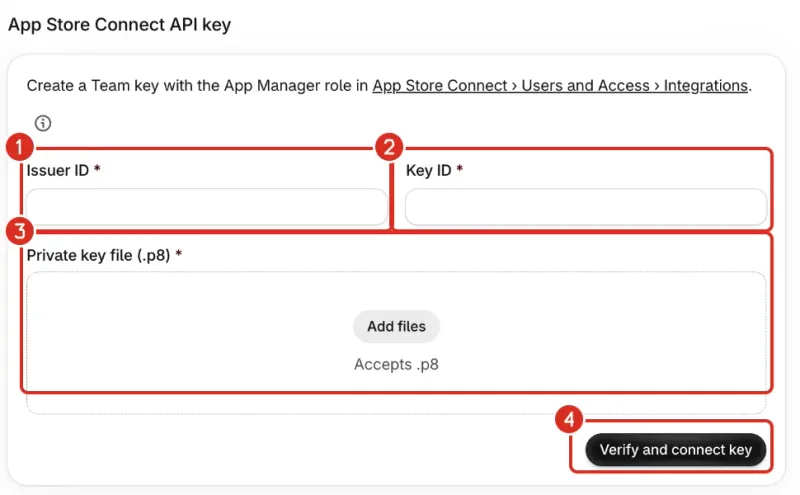
1: Issuer ID. 2: Key ID. 3: Private key file. 4: Verify and connect key. - Select Verify and connect key. When Apple accepts the key, the card shows Connected next to the key.
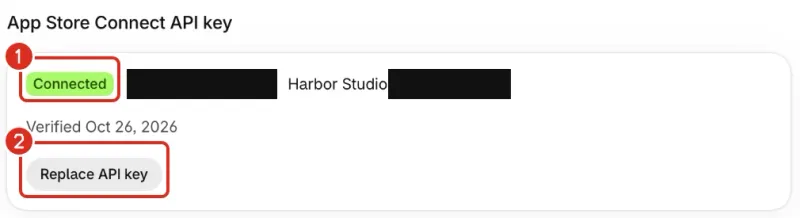
1: Connected. 2: Replace API key.
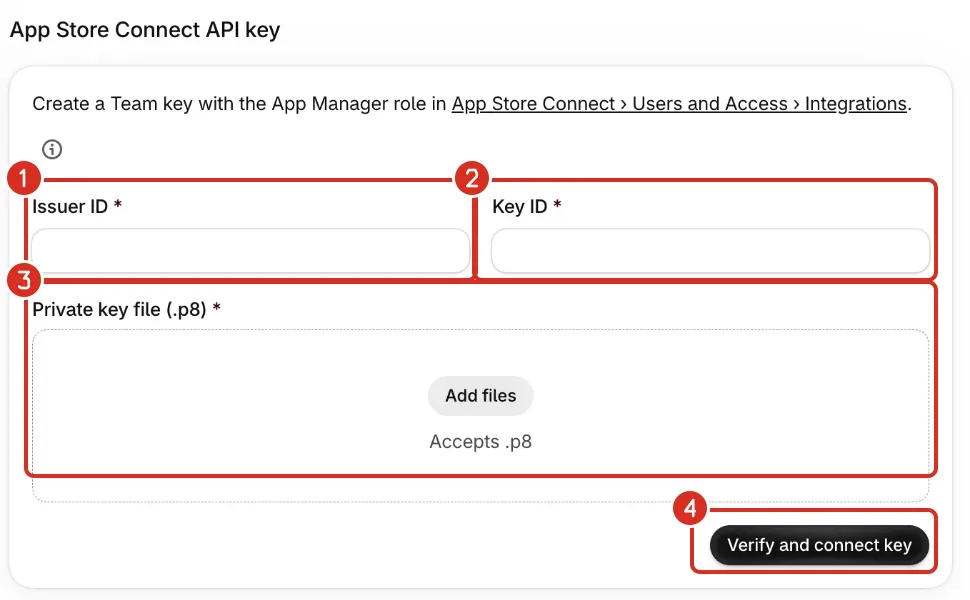
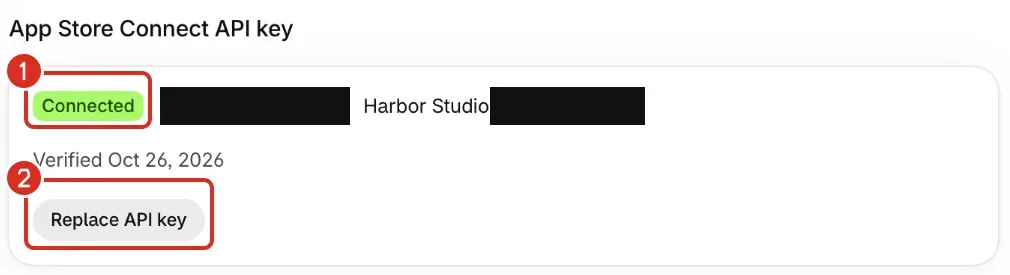
Replace your API key
- On the App Store Connect API key card, select Replace API key.
- Enter the new Issuer ID and Key ID.
- Add the new
.p8file. - Select Verify and connect key.
To cancel, select Keep current key instead.
Finish your App Store app
The App Store app card follows your API key. Before the key is connected, it says Connect your API key first. We register your bundle ID for you.
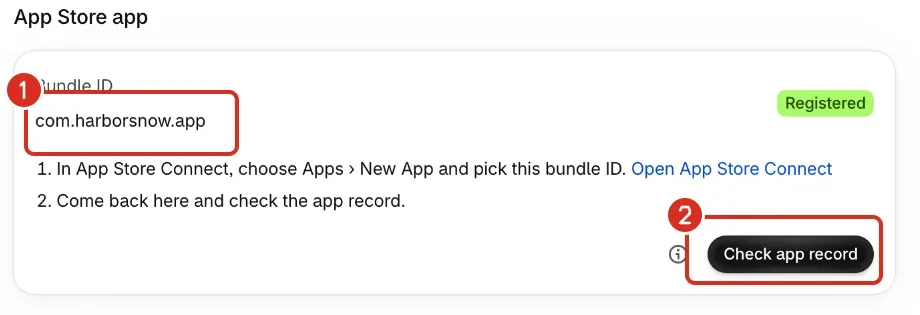
- Open the App Store app card. While Nativtap works, it says Registering with Apple… Wait for the Registered badge.
- Read the bundle ID. It is read-only: Nativtap picks it and registers it with Apple for you.
- In App Store Connect, select Apps, then New App. Pick this bundle ID.
- Enter your app name, a SKU and the primary language. The SKU can be any short code.
- Back in Nativtap, select Check app record.
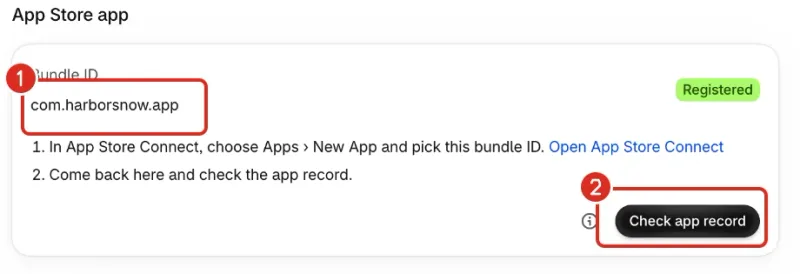
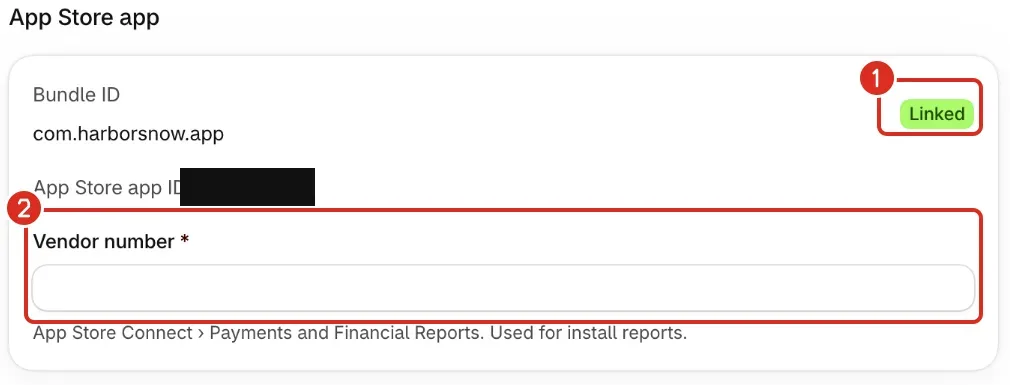
1: Bundle ID, read-only. 2: Check app record. - Wait for the Linked badge. While Nativtap asks Apple, the card says Checking with Apple…
- Enter your Vendor number. You find it in App Store Connect, under Payments and Financial Reports. Use digits only. Nativtap uses it for install reports.
- Select Save in the Shopify save bar.
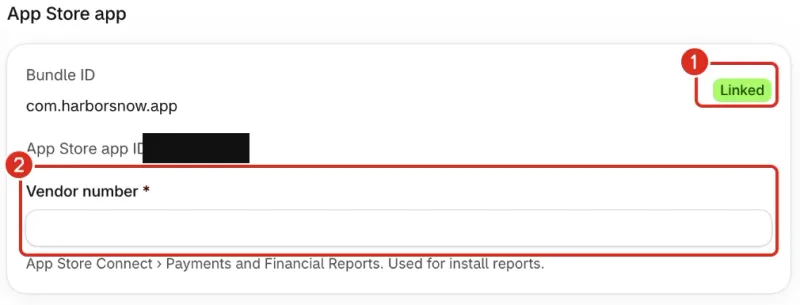
1: Linked. 2: Vendor number.
Add your push notification key
Push notifications and cart reminders pause until a working push key is added.
- On developer.apple.com, open Certificates, Identifiers & Profiles, then Keys. Create an APNs key and download its
.p8file. - In Nativtap, open the Push notification key card. It says Not added.
- Enter the Key ID of the APNs key.
- Check the Team ID. Nativtap fills it in when your API key tells it which team you belong to.
- Add the file under Private key file (.p8).
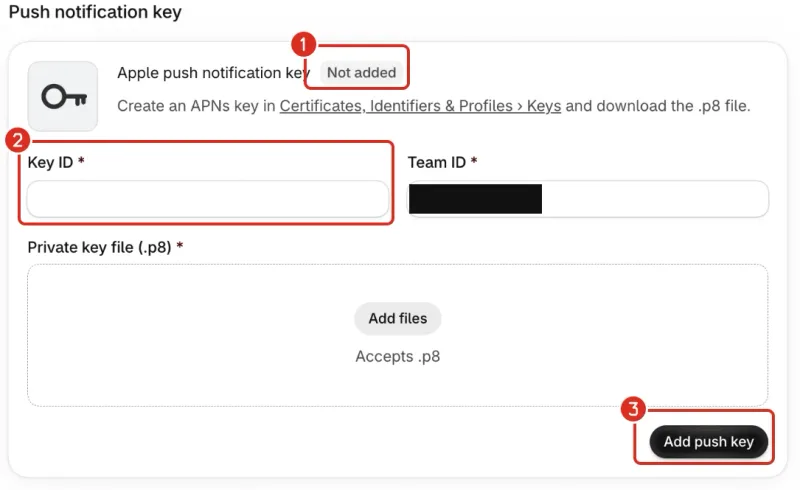
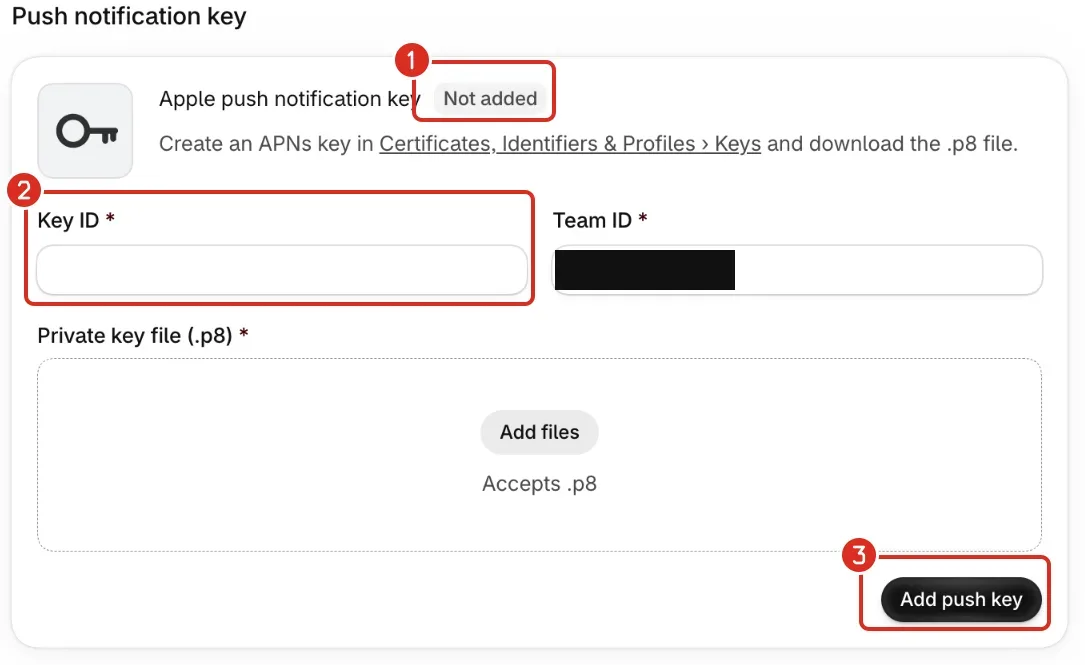
1: Not added. 2: Key ID. 3: Add push key. - Select Add push key. Nativtap asks Apple about the key right away. The badge says Not checked yet until Apple answers, then Verified.
- To ask Apple again, select Check key. It confirms that Apple accepts the key. It does not check your app's bundle ID.
To use another key, select Replace push key. Nativtap checks the saved key every day.
Set a membership reminder
This card is last on the page, and it is optional. It reminds you before your Apple Developer membership ends.
- Open the Apple Developer account card and turn on Remind me when expired. Turning it off clears what you saved here.
- Select your Account type: Not decided, Individual account or Organization account.
- Select where you are under Where are you?. The options run from Not started to Agreement accepted in App Store Connect.
- Enter the date under Membership renews on. Nativtap reminds you 30 days before it. The date is required once you pick Apple approved my enrollment or a later step.
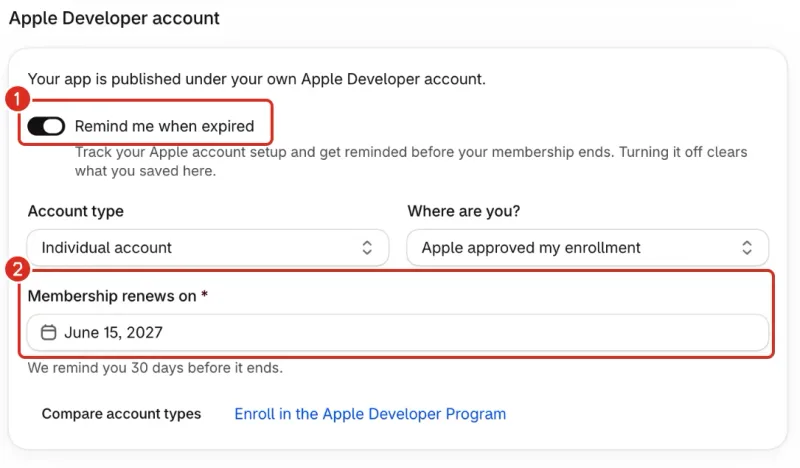
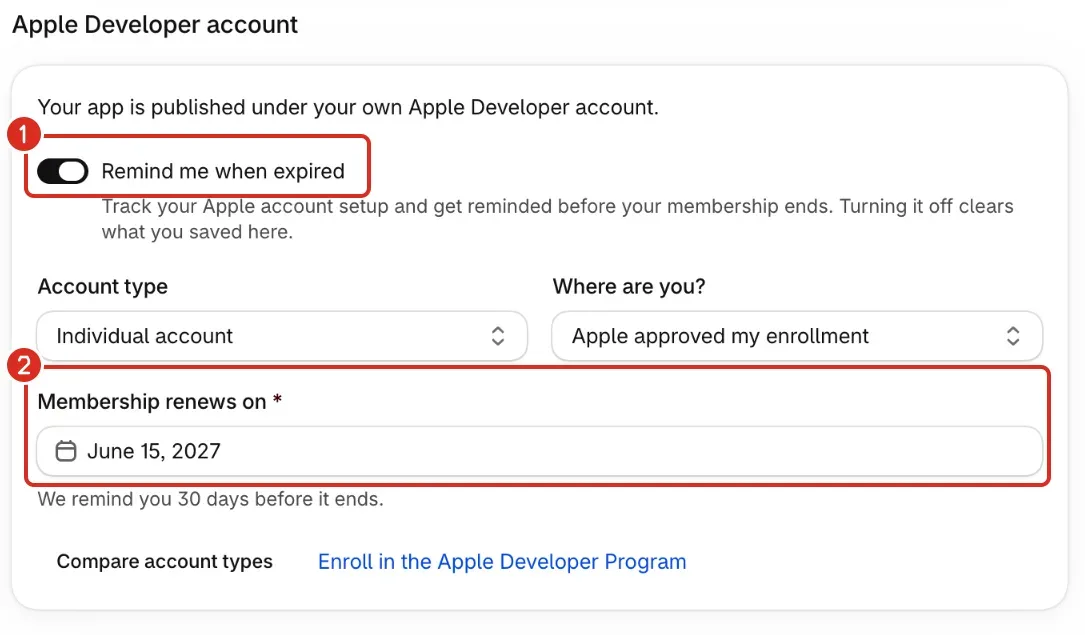
1: Remind me when expired. 2: Membership renews on. - Select Save in the Shopify save bar.
Compare account types
- On the Apple Developer account card, select Compare account types. It shows only while Remind me when expired is on, and it opens the dialog Individual or Organization?, which compares the two account types.
The table below is not the one in the dialog. It lists what Apple's enrollment page asks of each account type:
| Individual | Organization | |
|---|---|---|
| Who it is for | An individual, sole proprietor or single-person business | A company or other legal entity |
| What you need | An Apple Account with two-factor authentication turned on | An Apple Account with two-factor authentication turned on, a D-U-N-S number, and the legal authority to bind your organization to legal agreements |
| Name Apple checks | Your legal name. An alias, nickname or company name delays approval | Your legal entity name. Apple doesn't accept DBAs, fictitious business names, trade names or branches |
Apple charges 99 USD per membership year, and the price varies by region (Apple's enrollment page). To enroll, use Enroll in the Apple Developer Program next to it. Like Compare account types, it shows only while Remind me when expired is on. For an Organization, use Look up your D-U-N-S number in the dialog first.
Common problems
- Apple didn't accept this key.
- Check the Issuer ID and Key ID. Make sure the key isn't revoked: Apple can't reinstate a revoked key, so create a new one. An Individual key can't be used: create a Team key with the App Manager role.
- This key can't manage certificates and bundle IDs.
- The key's role is too low. Create a Team key with the App Manager role and connect it.
- Apple needs the Account Holder to accept the latest agreement in App Store Connect > Business.
- Ask the Account Holder to accept the agreement in App Store Connect. Then select Verify and connect key again.
- This file isn't an App Store Connect API key.
- Download the
.p8file again from App Store Connect. If Apple won't let you download it again, create a new key. - This Key ID doesn't match the uploaded file.
- Use the Key ID shown next to that key in App Store Connect. Apple names the download
AuthKey_followed by the Key ID. For a push key, use the Key ID shown in Certificates, Identifiers & Profiles. - We couldn't reach App Store Connect. Try again in a few minutes.
- Wait a few minutes, then select Verify and connect key again.
- We couldn't find a free bundle ID for your app. Contact support.
- Every bundle ID Nativtap tried is already held by another Apple account, and trying again can't help. Select Contact support on the card, or read Contact support.
- The App Store app card says Not registered.
- The first try to register your bundle ID didn't finish. Select Register bundle ID to try again.
- Apple no longer accepts your API key. Connect a new key.
- The key was revoked or removed. Create a new Team key with the App Manager role, then select Replace API key.
- Apple didn't allow this with your API key.
- Connect a Team key with the App Manager role. An Individual key doesn't work.
- We couldn't find an app with bundle ID … in App Store Connect.
- Create the app in App Store Connect with exactly that bundle ID. Then select Check app record again.
- Enter the vendor number from Payments and Financial Reports (digits only)
- Copy the vendor number from App Store Connect without letters or spaces.
- Apple rejected this key
- The key may have been revoked, or the Key ID or Team ID doesn't match it. Create a new APNs key in Certificates, Identifiers & Profiles, then select Replace push key.
- Enter the date your membership renews, or turn off the reminder.
- Add a date under Membership renews on, or turn off Remind me when expired.
- Enter a valid date, like 2027-03-02.
- Type a real date in the format
YYYY-MM-DD. - Your App Store Connect API key stopped working
- The key was revoked or removed. Create a new Team key with the App Manager role and connect it in Nativtap.
- Your Apple Developer membership ends soon
- Renew your membership at developer.apple.com/account so your app stays on the App Store. If it has ended, Nativtap says Your Apple Developer membership has ended: renew it the same way.
- Your distribution certificate expires soon
- Nativtap creates a new one at your next build. If your account has the maximum number of certificates, revoke an unused one in Certificates, Identifiers & Profiles. The same fix applies when Nativtap says Your distribution certificate has expired.
Related
Something wrong or out of date on this page? Tell us by email.
Still stuck?
Send us the exact message you see, and what you already tried.