 NativTap
Before you begin
- Add a push notification key from your Apple account (see the Connect your Apple account article in this Help center). Until you add one, Create push is greyed out.
- Have an iPhone with the Nativtap Preview app, to use as a test device.
- A link to a discount code, or to an app screen other than Cart, needs app version 1.5.0 or later. Older versions open Home.
Open the Notifications page
- From your Shopify admin, go to Nativtap > Notifications.
- Check the top of the page. Until you add a key, the Create push button at the top of the Notifications page is greyed out and a banner says Add a push notification key to send pushes.
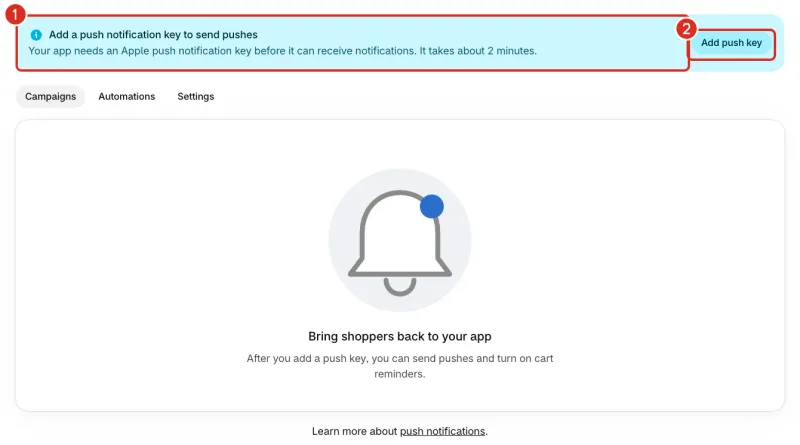
1: The banner that says a push key is needed. 2: Add push key. - If you see that banner, select Add push key.
- Add the key on the Apple account page.
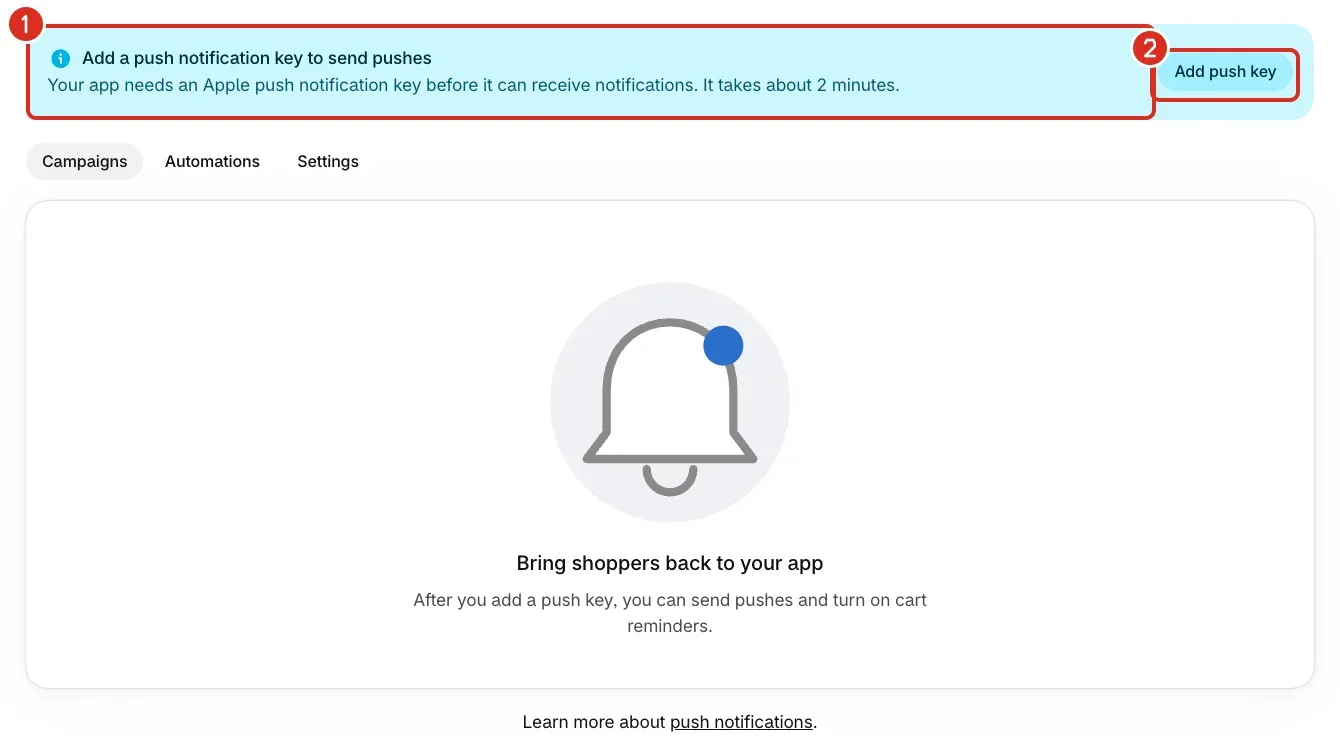
The page has three tabs: Campaigns for your pushes, Automations for the cart reminder and Settings for test devices and the permission prompt.
Add a test device
- On the Notifications page, select the Settings tab.
- If the Test devices list is empty, select Show preview QR code.
- If it already lists a device, go to Nativtap > App design and select Preview on iPhone to open the QR code.
- On your iPhone, open the Camera app.
- Scan the QR code. Nativtap Preview opens your draft.
- If iOS asks to allow notifications, select Allow.
- Go back to the Settings tab. Your iPhone appears in the list with the dates it was added and last opened.
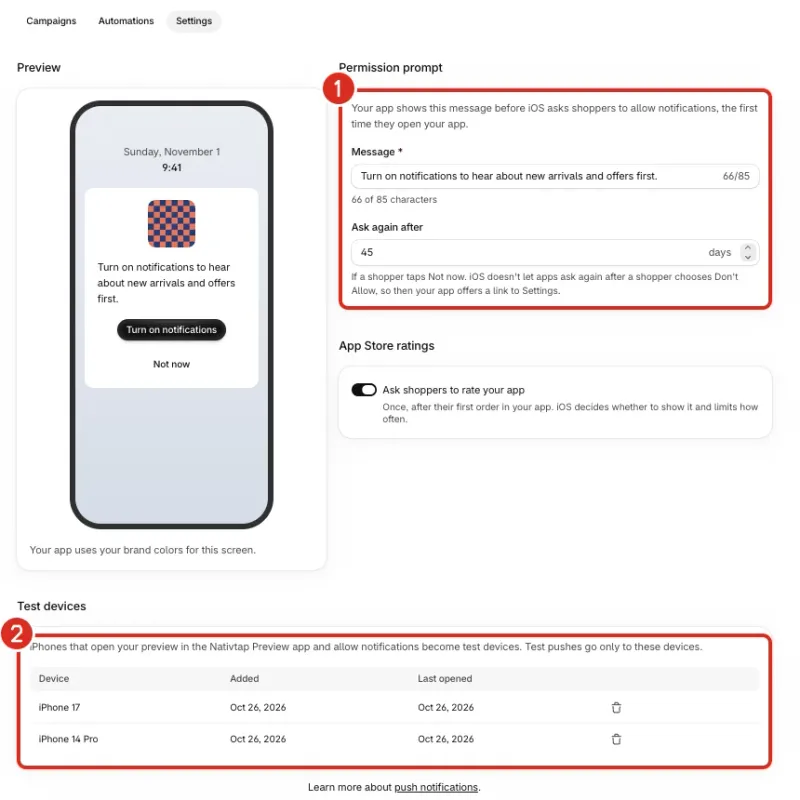
1: The message shown before iOS asks to allow notifications. 2: Test devices that receive test pushes.
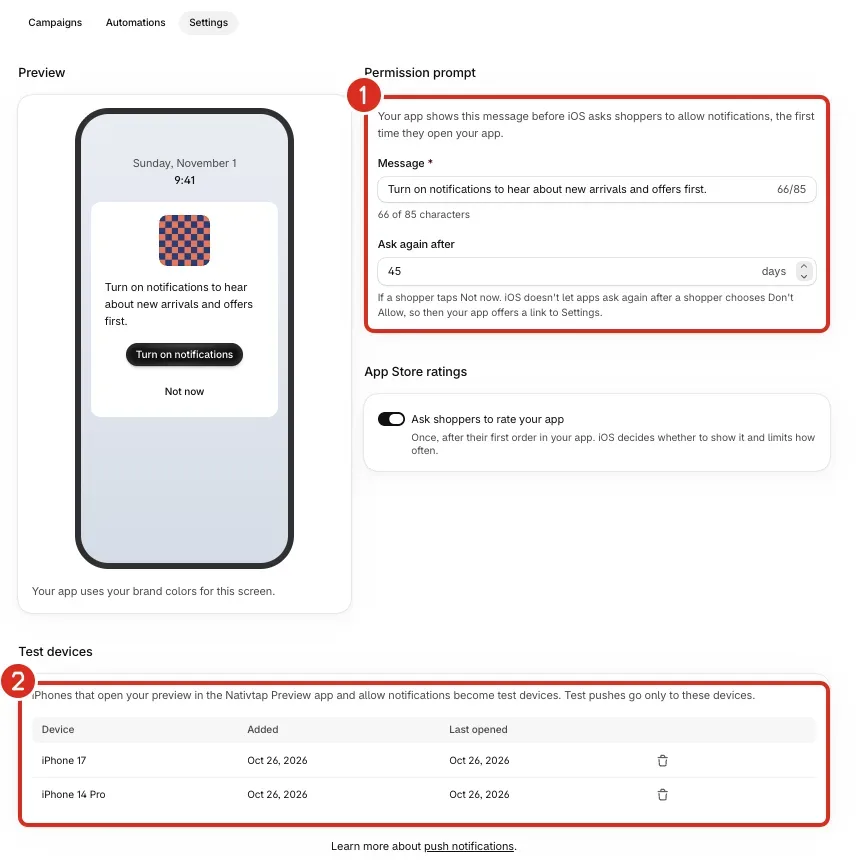
To remove a device, select the delete button in its row. Your store keeps 20 test devices; a new one replaces the oldest.
Write and send a push
- On the Notifications page, select Create push.
- In the window, choose From scratch or a template: New arrivals, Flash sale, Back in stock or Free shipping.
- Select Create push. A template fills in the title, message and link type. Nothing is saved until you send or schedule the push.
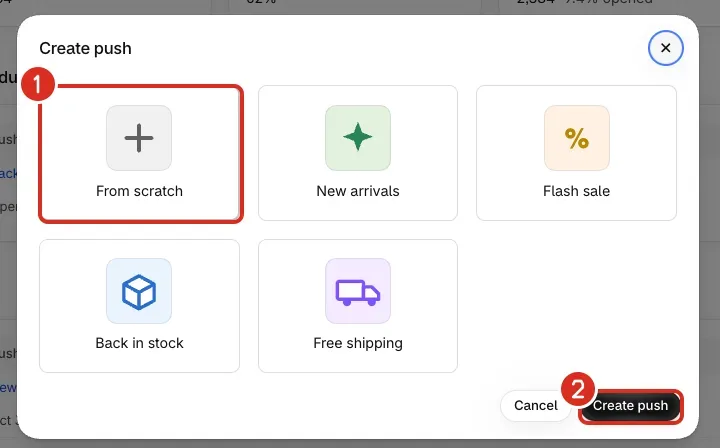
1: From scratch. 2: Create push. - Under Message, enter a Title. Nativtap recommends 50 characters and allows 100.
- Enter a Message. Nativtap recommends 120 characters and allows 500. Shoppers may not see the end of a longer one.
- Optional: add an Image. Use a JPEG, PNG or GIF under 1 MB. Nativtap crops it to 2:1 (1200 × 600 px).
- Under Link, select Browse.
- Choose what opens when a shopper taps the push: Collections, Products, Pages, App screens or Discount code. A discount code is added to the shopper's cart.
- To open a web page instead, paste an address that starts with
https://. With no choice, the push opens Home. - Under Schedule, choose Send now or Schedule for later.
- For a later push, pick a Date.
- Pick a Time. Times move in 5-minute steps. Pick a time at least 5 minutes ahead and within 90 days.
- Pick a Time zone. It starts as your store's.
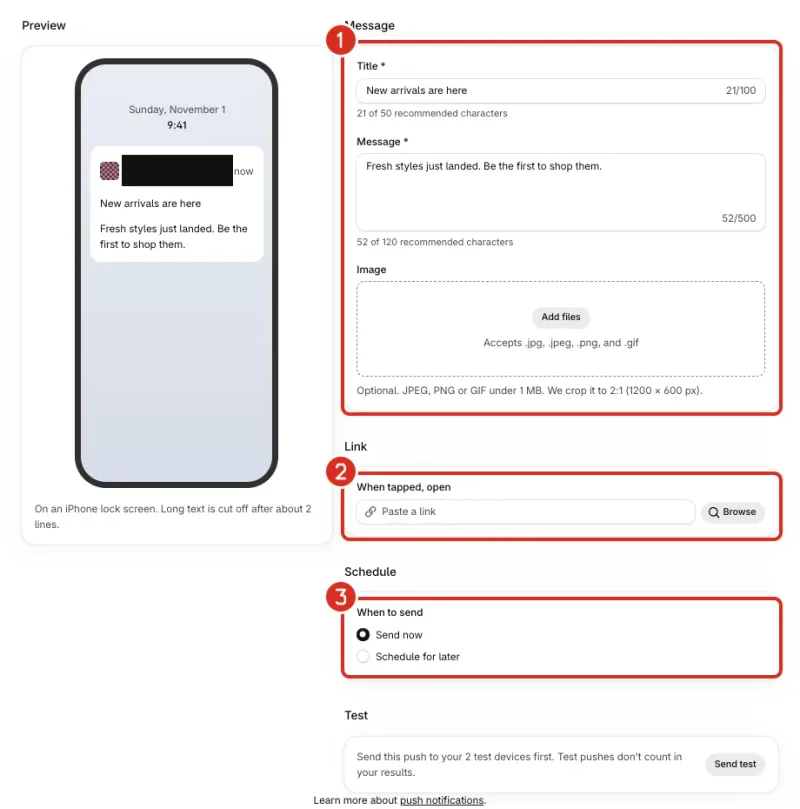
1: Message: title, text and image. 2: Link. 3: Schedule. The Test card at the bottom sends the push to your test devices. - Under Test, select Send test. The push goes only to your test devices. Test pushes don't count in your results.
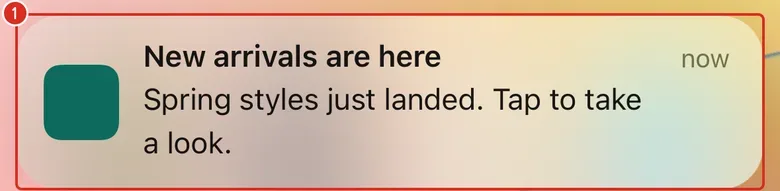
A push shows up on a shopper's iPhone as a banner like this one. Yours has the title and message you wrote.
- Select Review and send. For a later push the button reads Review and schedule.
- Read the window. It says about how many people get the push.
- Select Send push or Schedule push. A push you send can't be undone.
If nobody has turned on notifications yet, the window says so and no one receives the push.
Change or cancel a scheduled push
- On the Campaigns tab, under Scheduled, select the title of the push.
Change the push
- Edit what you need.
- Save your changes.
Cancel the push
- Select Cancel push.
- In the window Cancel this push?, select Cancel push again. A canceled push is never sent, and you can't undo this.
You can edit or cancel a push until it starts sending.
Read the results
The Campaigns tab opens with a Performance recap for the last 7 days. It counts the pushes you send or schedule, not cart reminders.
| Card | What it shows |
|---|---|
| Notifications on | Devices that allow notifications from your app. |
| Opt-in rate | The share of devices seen in the last 90 days that allow notifications. |
| Sent | Notifications Apple accepted in the last 7 days, and the share that were opened (shown as a percentage). |
| Revenue | Revenue of app orders placed within 24 hours of opening a push, in the last 7 days. |
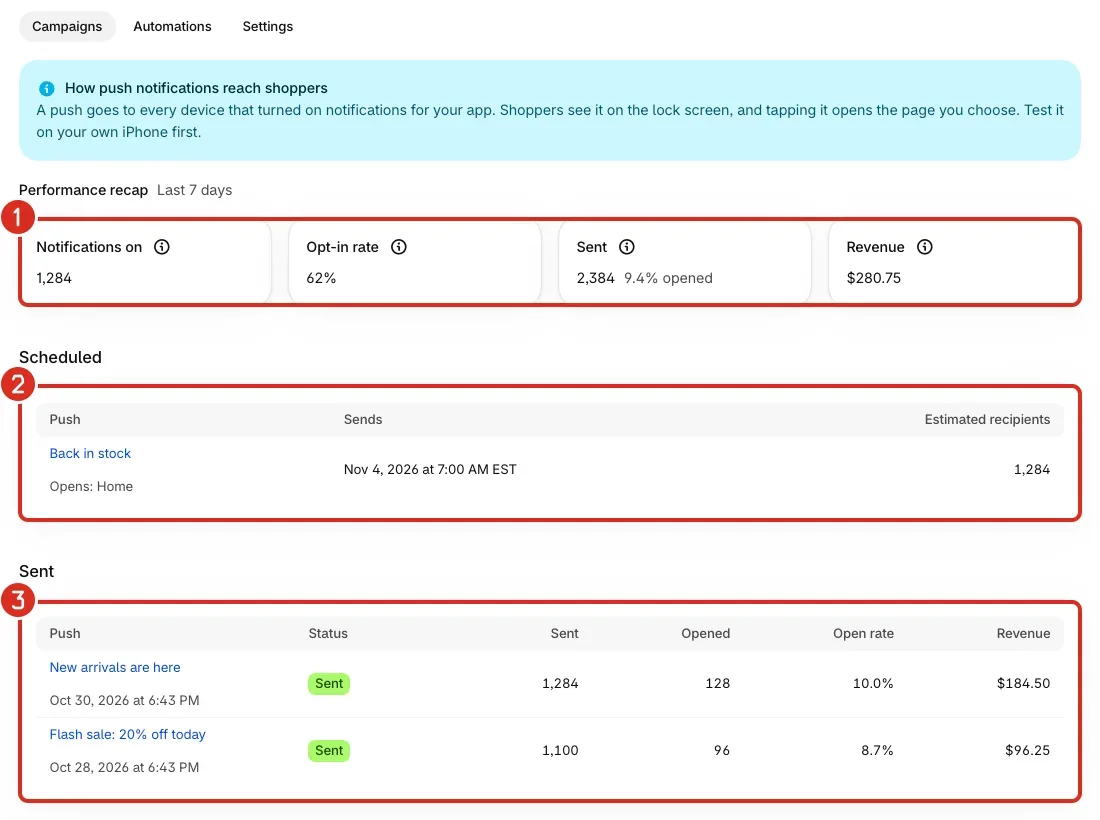
Below the recap, Scheduled lists the pushes waiting for their time, with when each sends and an estimate of recipients. Sent lists the others with a status of Sending, Sent, Failed or Canceled, and their Sent, Opened, Open rate and Revenue. Each table shows up to 50 pushes.
- Under Sent, select the title of a push.
- Read Results. Sent is the devices Apple accepted the push for. Delivered is the devices that showed it, estimated from a sample when the audience is large. Opened is taps on the push. Orders and Revenue count app orders within 24 hours of opening it, before refunds. Failed is devices that can't get notifications anymore; Nativtap removed them.
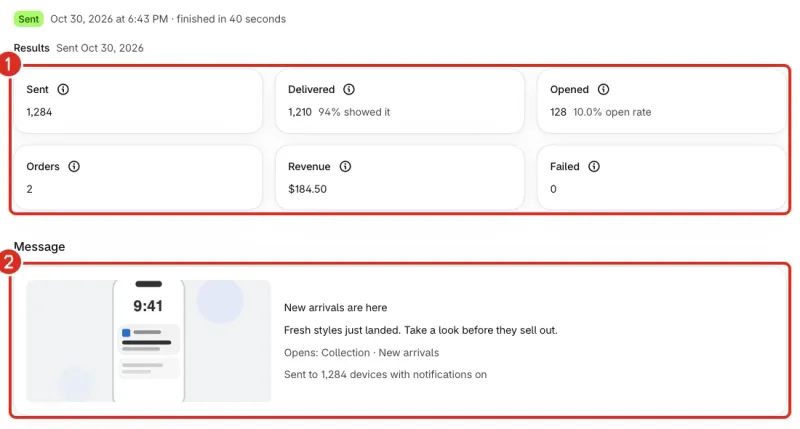
1: Results. 2: The message that was sent. - To send a similar push, select Duplicate push. A new push opens, filled in from this one.
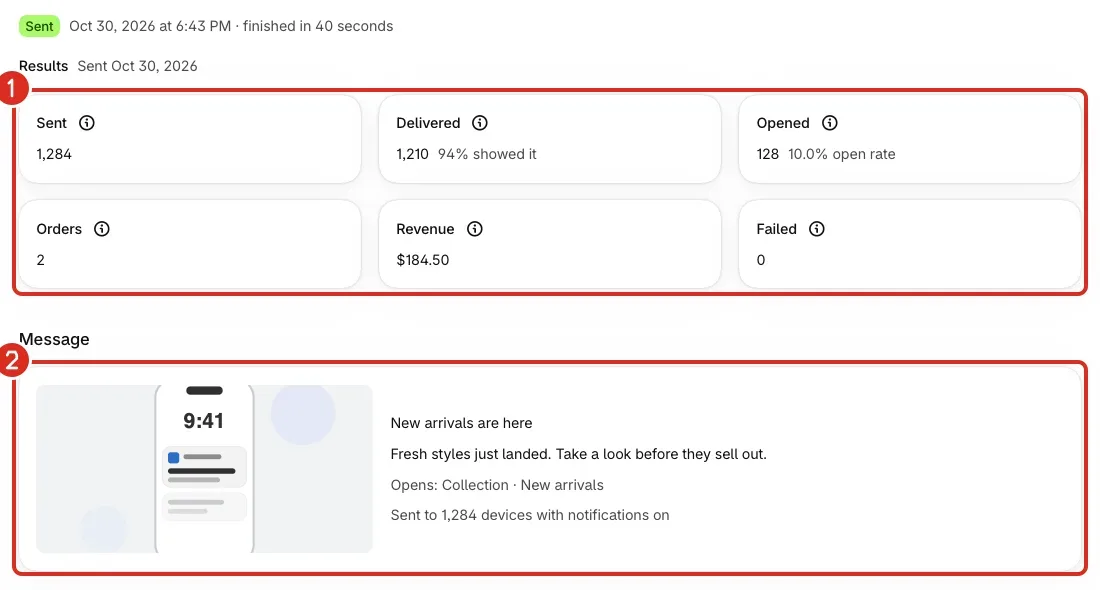
Shoppers also see your pushes on the Notifications page inside the app. Tapping one there doesn't count as Opened. See Show notifications in your app.
Change the permission prompt
- On the Notifications page, select the Settings tab.
- Under Permission prompt, edit the Message your app shows before iOS asks shoppers to allow notifications. It can be up to 85 characters.
- In Ask again after, enter the number of days, from 1 to 365, to wait after a shopper selects Not now.
- Under App Store ratings, turn Ask shoppers to rate your app on or off. The app asks once, after a shopper's first order, and iOS decides whether to show it.
- Save your changes. You don't need to publish.
iOS doesn't let an app ask again after a shopper chooses Don't Allow. Your app then offers a link to the iPhone Settings instead.
Common problems
- Add a push notification key to send pushes
- Your app needs an Apple push notification key before it can receive notifications. Until you add one, Create push is greyed out. Select Add push key.
- Apple rejected your push key
- Pushes and cart reminders are paused. The key may have been revoked in your Apple Developer account. Create a new key and add it in Nativtap with Replace push key.
- Push notifications are paused for your store
- Nativtap paused pushes and cart reminders for your store. Contact support to find out why and turn them back on (see Contact support).
- You don't have a test device yet
- Send test stays greyed out until a test device exists. Open your preview in the Nativtap Preview app on your iPhone and allow notifications. The device then shows under Test devices.
- Add a test device first: open your preview in Nativtap Preview on your iPhone.
- Nativtap found no test device when you selected Send test. Follow the steps in Add a test device, then select Send test again.
- The test is taking longer than usual. Check your phone in a minute.
- The test push hasn't finished sending yet. Wait a moment, then check your iPhone. Test pushes go only to your test devices.
- Your push is still being created. Check Push notifications in a moment.
- Nativtap is still creating this push from an earlier attempt. Wait a moment and open the Campaigns tab to see whether it is listed before you send it again.
- This push arrives early in the morning, or This push arrives late at night
- The time you chose is between 10:00 PM and 7:00 AM in the time zone you picked. Notifications at night can annoy shoppers and lead them to turn notifications off. The warning doesn't block the push. Choose another time to avoid it.
- Choose a time at least 5 minutes from now, or Choose a time within 90 days
- Pick a date and time inside that window.
- Shorten the title or message
- Apple limits how much one push can carry. The title, message and link together are too long. Shorten the title or the message.
- This push has already started sending
- A push can't be edited or canceled once it starts sending. Open it from the Sent table to read its results.
- This push stopped: Apple rejected your push key
- The key may have been revoked in your Apple Developer account. Select Replace push key on the banner and add a new key. Then select Duplicate push to start a new push filled in from this one.
- This push stopped: no push key
- Your app has no push notification key. Select Add push key on the banner and add one. Then select Duplicate push.
- This push stopped: push notifications are paused for your store
- Nativtap paused pushes for your store. Contact support to find out why and turn them back on (see Contact support). Then select Duplicate push.
- This push stopped: your store is locked
- Nativtap can't send pushes while your store is locked. Contact support to find out why (see Contact support).
- This push stopped: your app was uninstalled
- Nativtap can't send pushes to a store that uninstalled the app. Once your store has the app again, select Duplicate push to start a new push.
- This push stopped: something went wrong on our side
- Select Duplicate push to try again. If it keeps happening, contact support (see Contact support).
- Couldn't send the push, Couldn't send the test, or Couldn't save the push
- The banner under the heading gives the reason. If it says to try again in a moment, wait a moment and try again. If it keeps happening, contact support (see Contact support).
Related
Something wrong or out of date on this page? Tell us by email.
Still stuck?
Send us the exact message you see, and what you already tried.